 Next Login

In this application note we will show you how to setup and insert a microphone with talkover function in an installation with Digiline. It will incorporate several audio sources and several zones.
To do this we will use the following elements:
Digiline 8 or Digiline MX
DM 1N (as desktop microphone)
DB 500 (Direct box)
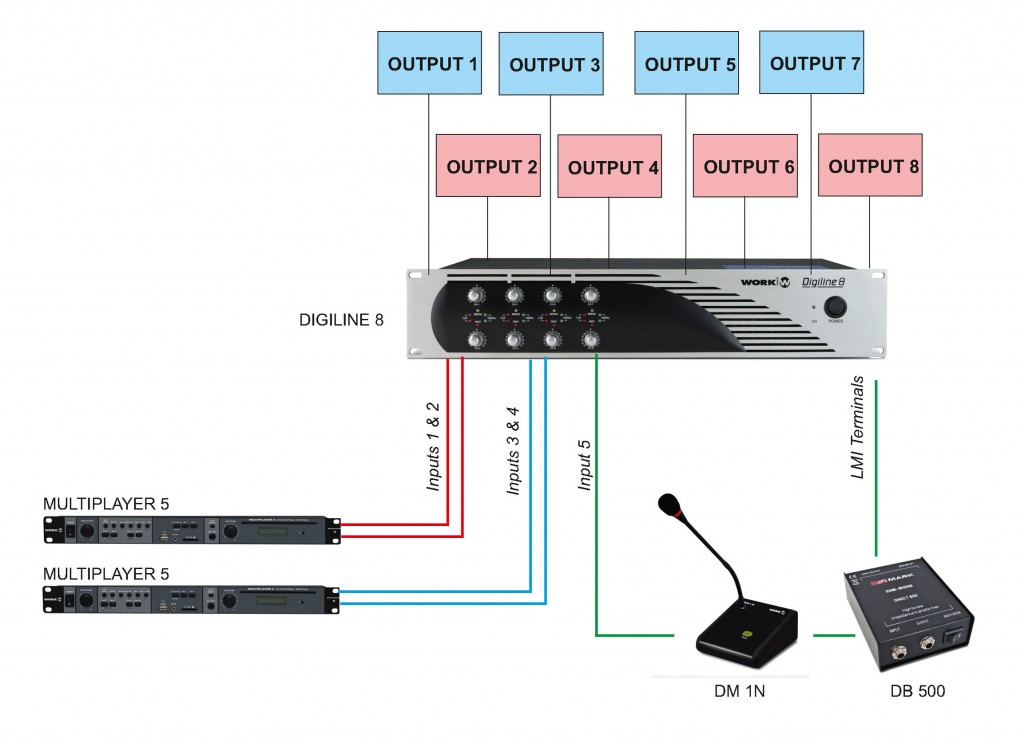
The example installation has 2 audio sources (2x MP3 players) + desktop microphone .
These sources are sent to the 8 zones (availables on both Digiline devices). The choice of the source played in each zone can be configured from the WorkCAD software .
The installation example is as follows:
After making the indicated connections, we proceed to configure the behavior of the processor in the state of activation of the Talkover function.
To do this, we run the software WorkCAD .
In the NETWORK display locate the Digiline device to be configured. Click on the "+ " icon to open the device in the edit window.

Outputs must be configured as follows :
Outputs 1 , 3, 5 , 7: Inputs 1 and 2 on (the rest in MUTE)
Outputs 2 , 4, 6 , 8: Inputs 3 and 4 on (the rest in MUTE)

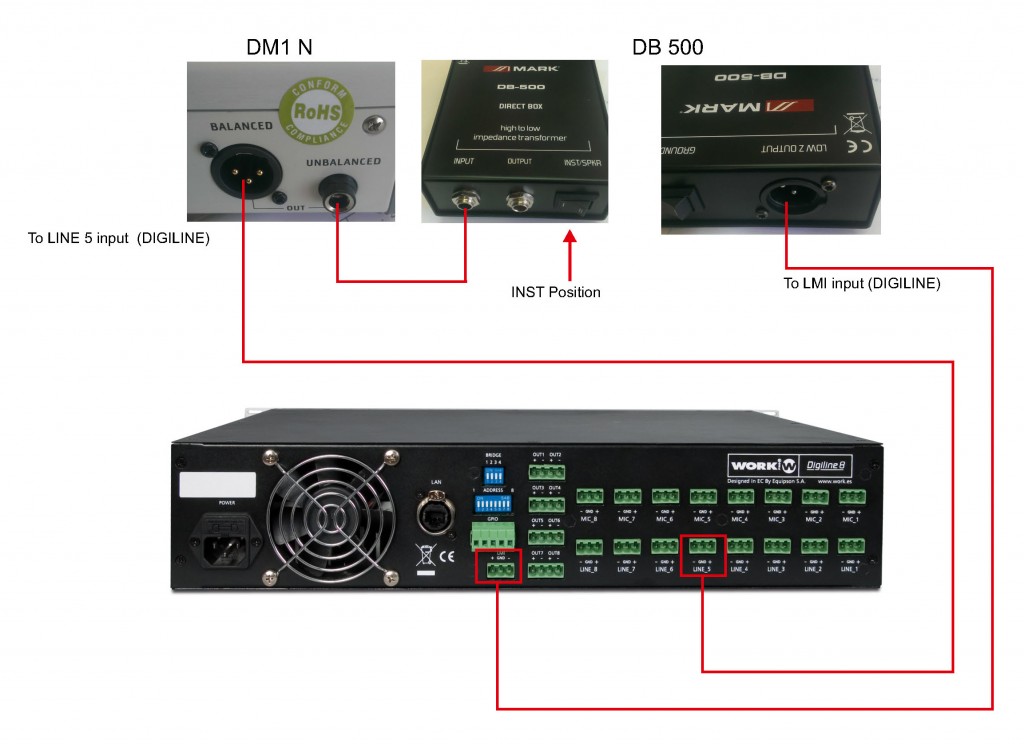
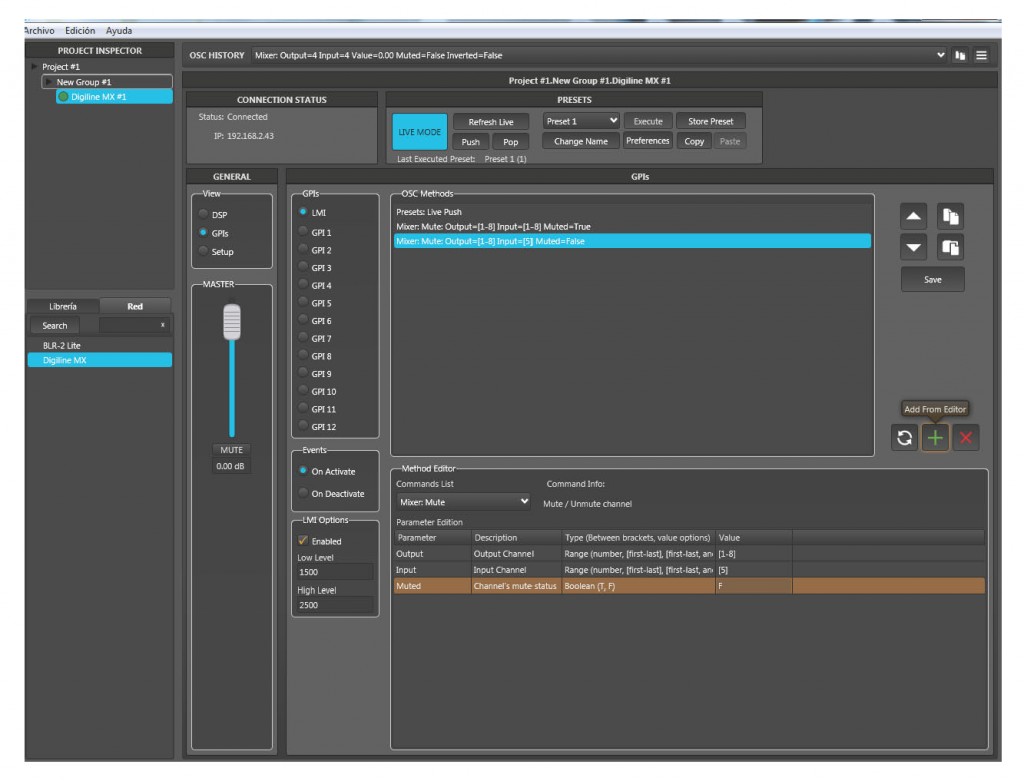
Now we proceed to configure the talkover function associated with the microphone connected in the LMI terminals.
Select GPI tab and LMI section.
In the "Event" section select ?On Activate? to set the commands you wish to carry the processor to control the LMI contact.
In LMI options tab mark the upper and lower values ??of sensitivity. A normal value may be 1500 and 2500. These values depend on several factors like noise present, the threshold beyond which they are to act, etc.
First load the "Presets: Live Push" command, which will back the status of the processor previous to close the LMI contact.
Press the green icon "+"
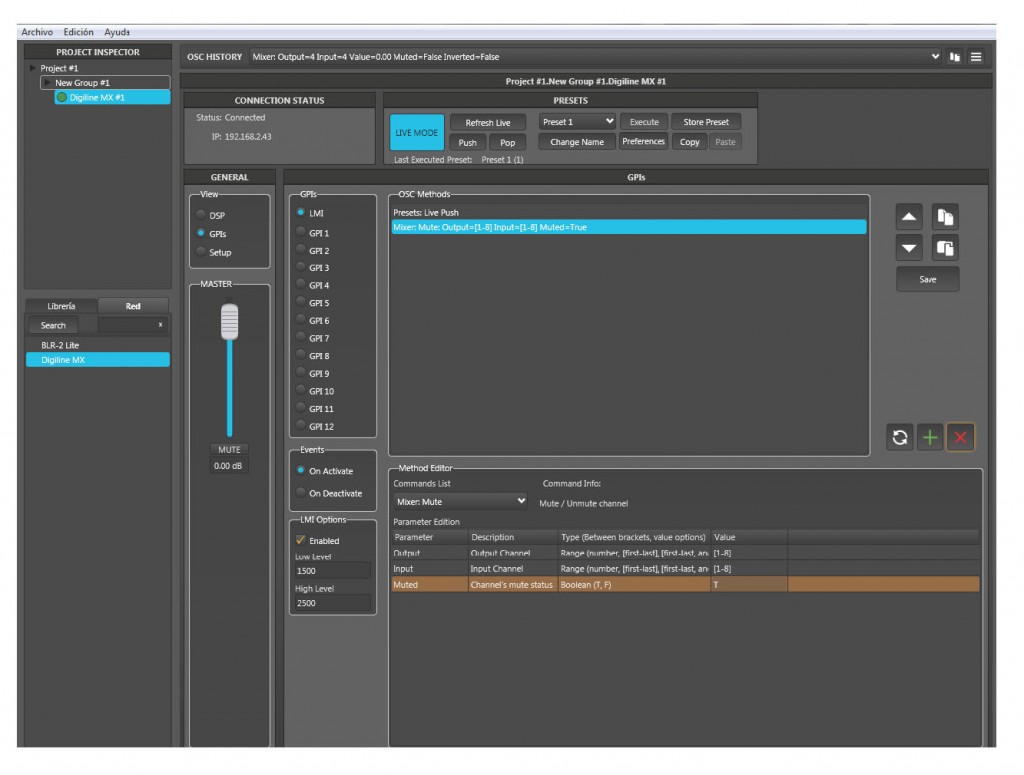
Then select from the list of command the "Mixer Mute" command
In the first line select all outputs with the expression "[1-8]"
In the second line select all entries with the expression "[1-8]"
In the third line (muted) select "T" (true) as affirmation
This first step has ensured that all outputs Mute inputs connected to them
Press the green " +" and then "Save"
Now repeat the above command ( Mixer Mute )
In the first line select all outputs with the expression " [1-8 ]"
In the second line we select all entries with the phrase " [ 5 ]"
Input 5 corresponds to the DM 1N microphone
In the third line ( muted ) select " F" (false ) as denial
This step has ensured that all outputs activated ONLY the input 5 (for the DM 1N microphone).
Press the green " +" and then "Save"
Now select the " Event" status " On Deactivate " to set that makes the process when the microphone push button is hold ( LMI open contact )
In the command list select " Presets : Live Pop" .
Press the green " +" and then "Save"
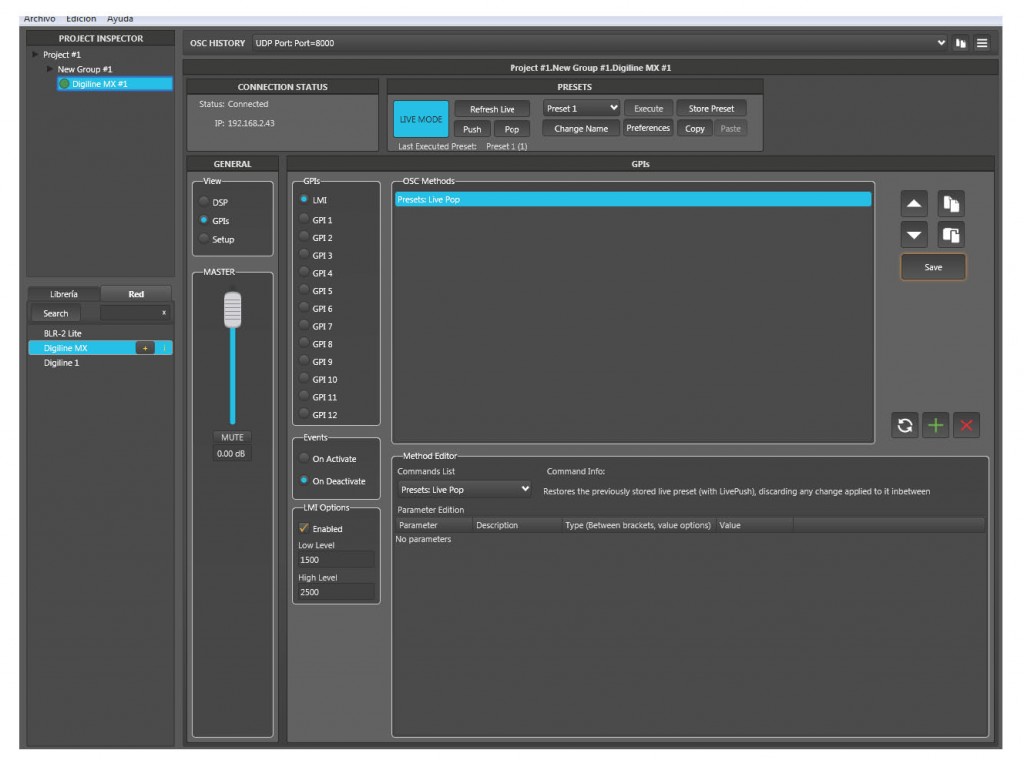
In this way, the processor retrieves the state that had previously recorded with the Push function, restoring normal working mode.